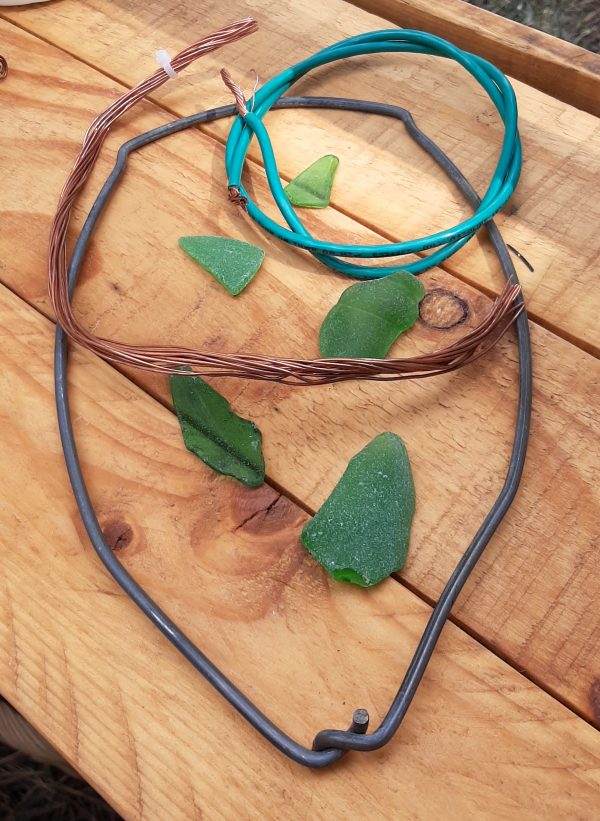
[ Sitting on my usual work surface, an old mouse pad, is a rusty piece of formerly-flat sheet steel, perhaps an inch and a quarter wide and maybe six long, with one long edge folded over. It’s been weathered, worn, and run over such that it’s now creased in a number of places, with one end turned until it’s ninety degrees from the rest. Under it are a number of pieces of thick copper wire, cut into various shapes. ]
I’ve had that hunk of metal kicking around for YEARS now, & every once in a while I’d pull it out, stare at it for a couple minutes, & then put it back, because I did NOT know what to do with it. Making my usual attachment points all the way around the ends felt cumbersome, the one single hole was NOT enough on its own for an entire piece, & past that, I just didn’t know how to handle it.
Round about March, while planning an entire month of faery home decor pieces (alas for that plan!) I pulled it out once again, stared at it for a long moment, then started groping for wire and the closest set of pliers, because I KNEW WHAT I NEEDED TO DO.
(miiiight have sounded a bit like a mad scientist in that moment. or, you know, the dude who yells portentously about knowing what he needs to do.)
This is a totally new way of doing things for me & I am VERY happy about that, because I got to PLAY & that’s AWESOME.
Of course, hammering & texturing the bits that would show was kinda tricky.
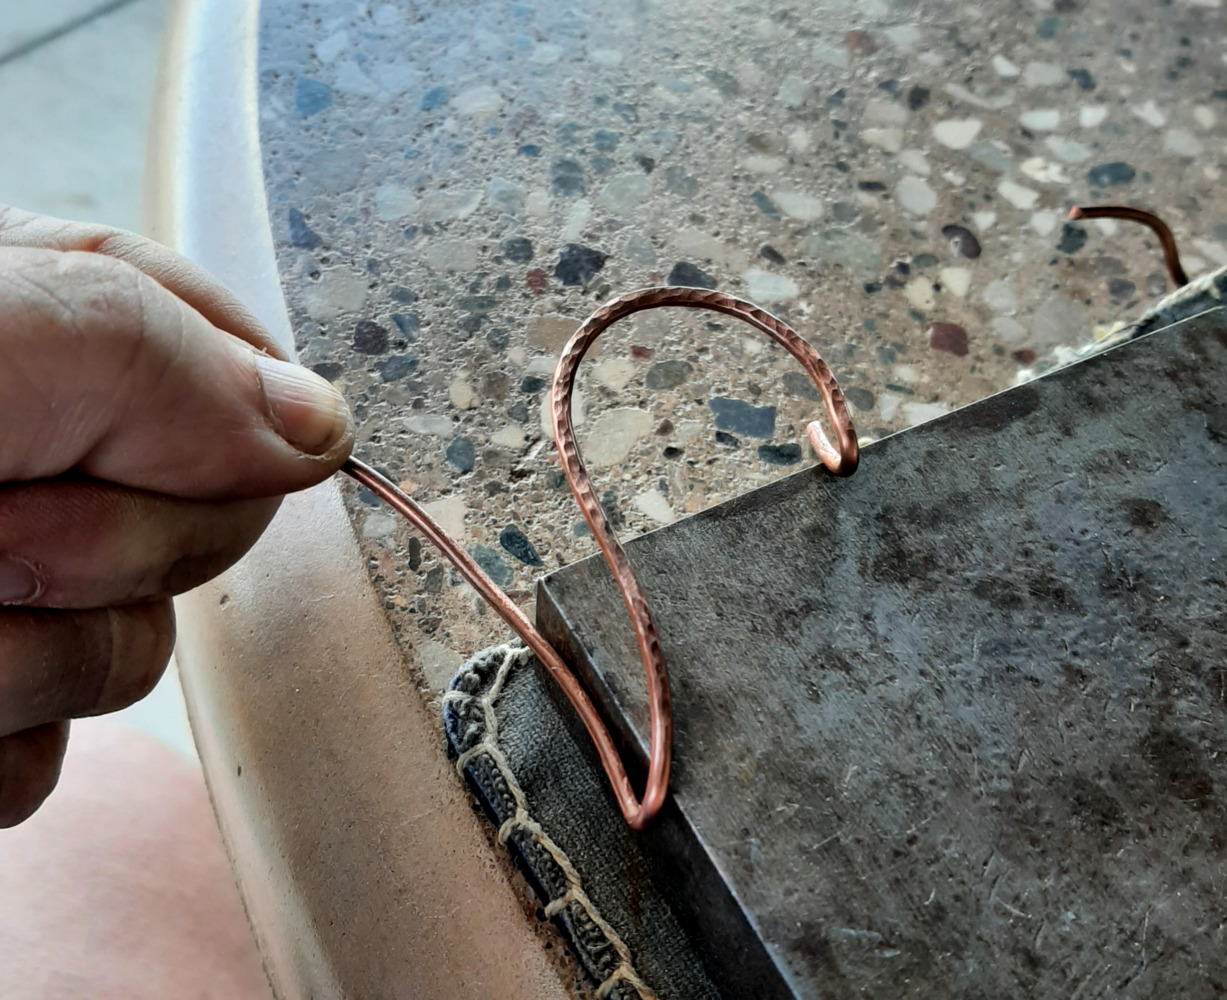
[ My rectangular jewelry anvil is sitting on the mouse pad, and I’m holding a curved piece of copper wire so that part of it sits just at the edge of the anvil; the way it’s curved means it can’t sit any further in, but the part that needed to be hammered and textured is done. ]
I’ve done very little three-dimensional wire stuff that needed hammered, & things definitely needed to happen in ways that they don’t when the wire is flat, but I got it figured it, & it was a good first exercise in How to Do the Thing.
Next up, wrapping the wire around (& through) the rusty bit in the manner I’d planned for it to, & then, importantly, getting it to stay there!
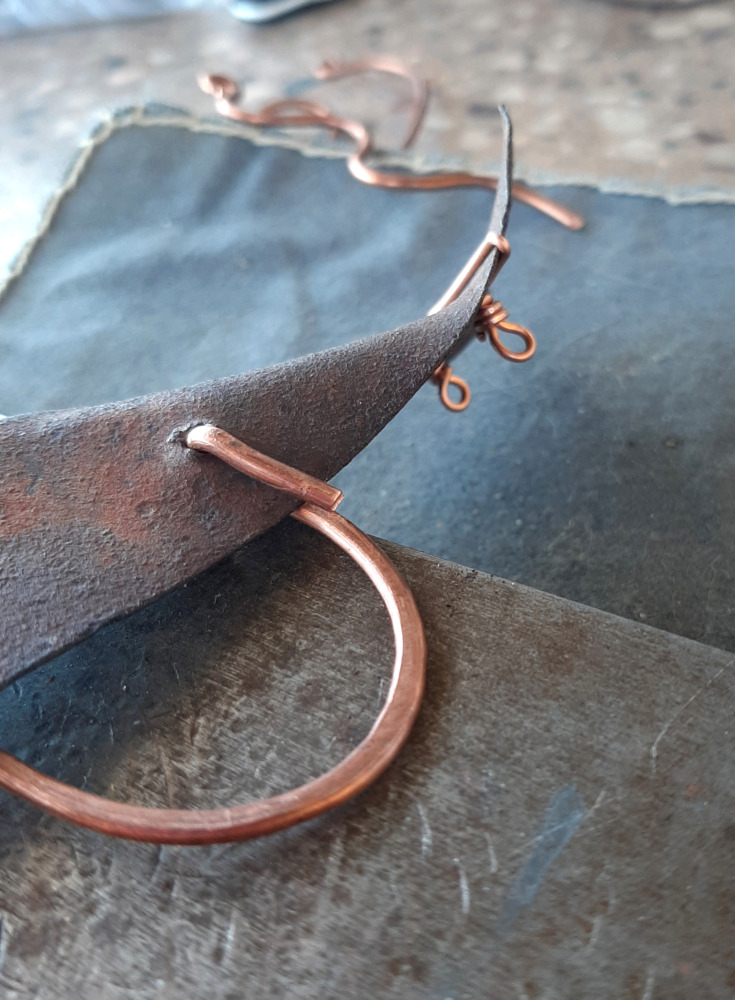
[ The very end of the rusty piece has an attachment point on it — I did wind up needing them — but the focus of this picture is on the spot where one end of the wire goes through the single hole in the rusty bit, then was folded over and hammered so it’s firmly in place. ]
This took some fiddling. The wire fit fine when I first bent it into shape, of course, but hammering will always change that shape some — quick! Can someone tell me why that is? — & so I had to have at with the pliers some, but it turned out okay, & once it was where I wanted it, I hammered the bend at the other side of the rusty bit so it would STAY there.
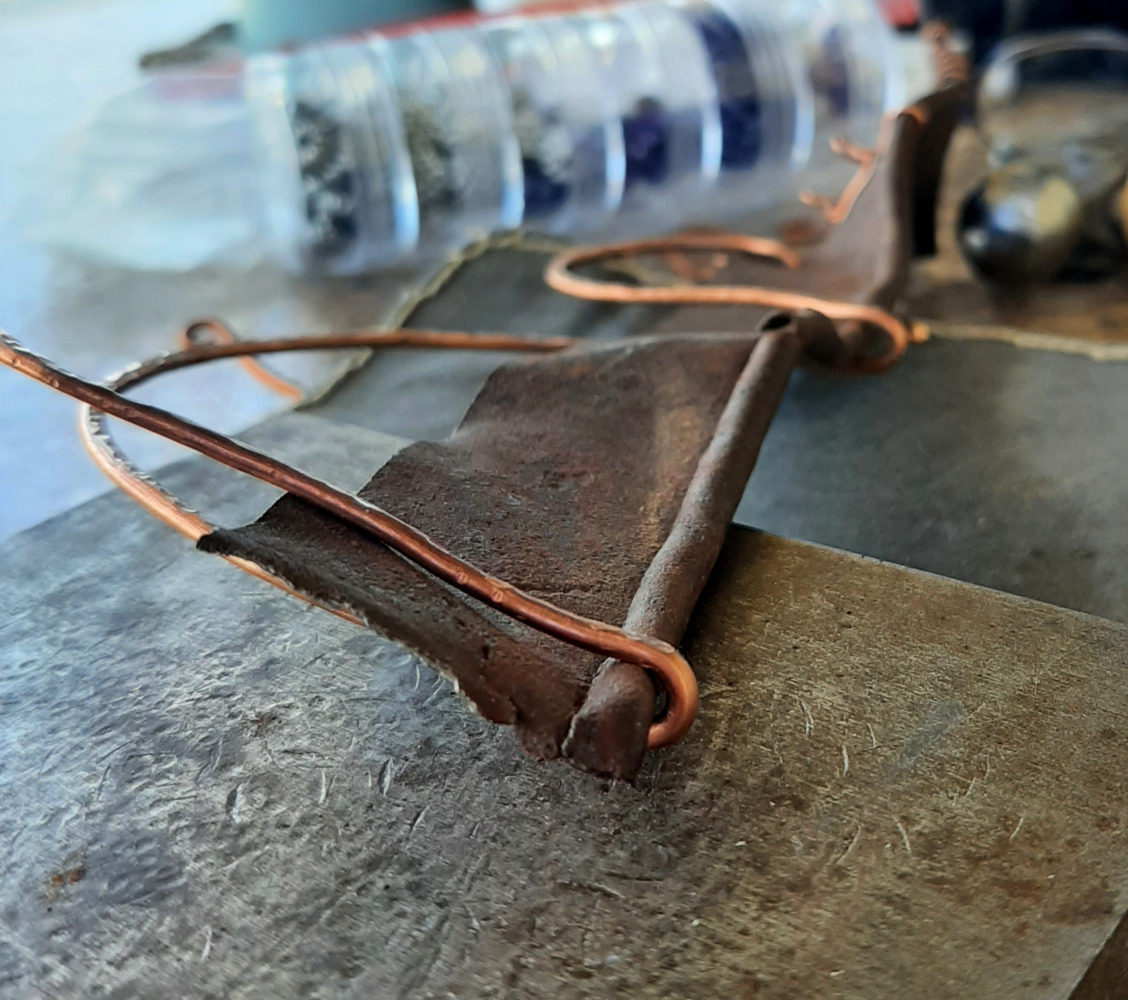
[ A view down the length of the rusty bit: the far end is blurry, but the close end features copper wire that comes up and over what will be the top edge of the rusty bit, then back down the other side. ]
Hard part done, now I just had to finish the rest! It would be easy! I’d already planned it out!
AHAHAHA nope. That wasn’t going to work at all! It would be far too sparse! Leaving negative space is all well & good, but that was too much!
So (once I got home, having forgotten to bring spare wire at all, in fact), I whipped out my wire, cut a couple extra bits, hammered em real quick, & voila! ready!
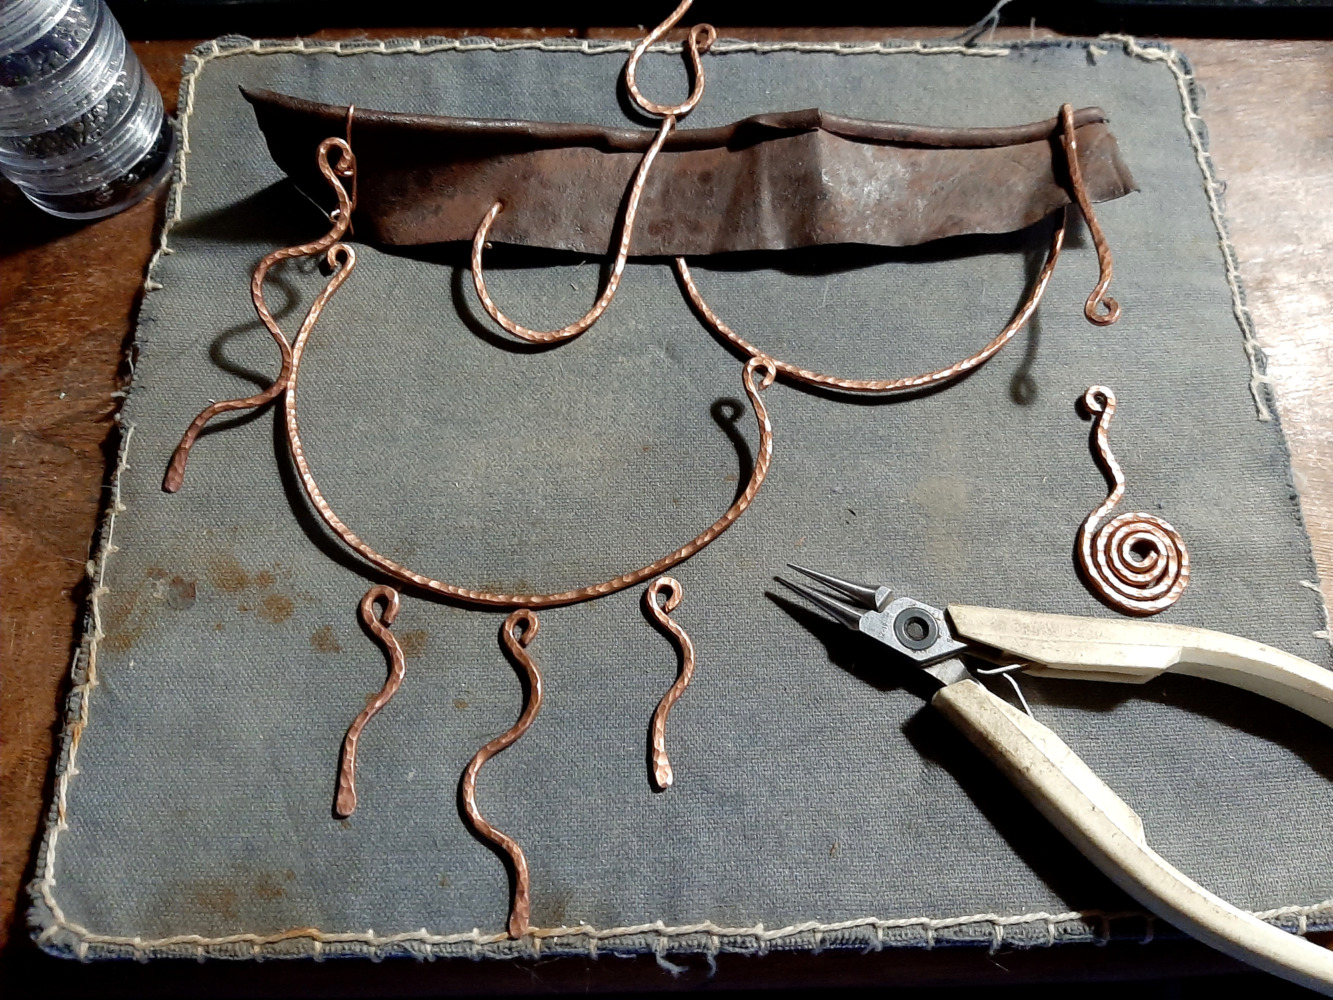
[ All the copper wire bits are hammered and in place! Two descending arcs hang below the rusty bit; one is part of what wraps around it, and is on the small side; the other, larger one, will hang between the first one and one of the fastening points on the left side. A long wavy bit sits below the other fastening point on the left, and a spiral sits below the very end of the wire that wraps around the rusty bit, which hangs down on the right side and ends in a loop. ]
AHAHAHA no. Still gotta do the beads. I’d picked out a couple I thought might work, as pictured below:
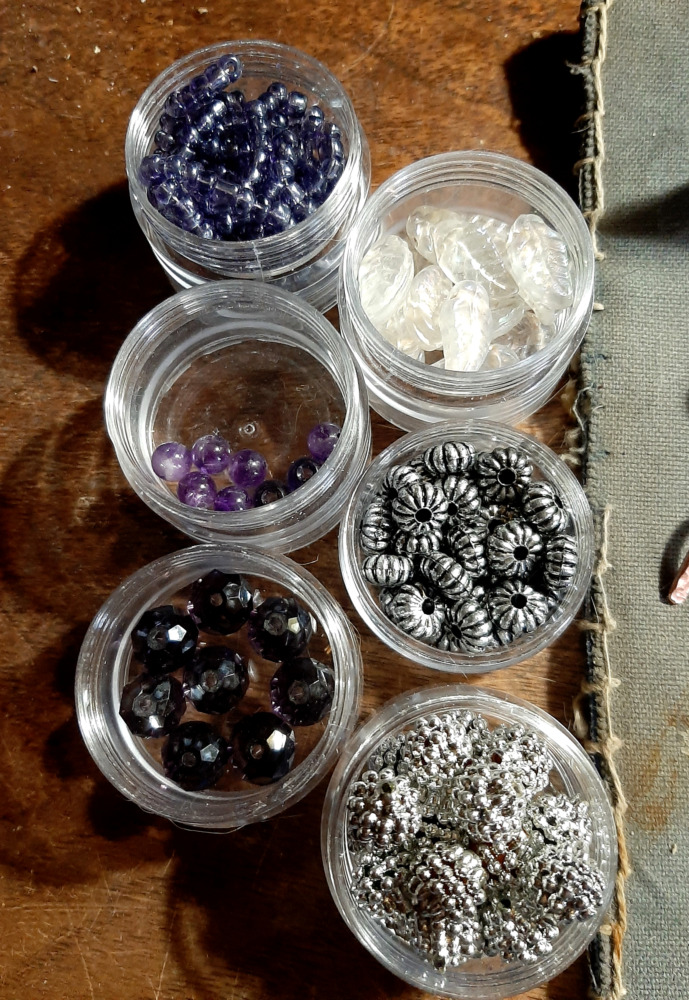
[ Six of the little jars, seen from above, hold a variety of beads in small plastic jars: one row has small blue-purple ones next to larger round amethyst, with even larger, faceted purple beads next to them; the last look almost black in this light. The other row has clear-white leaf beads at the top, with oval silver-colored beads with black accents below them, and at the bottom, larger silver-colored beads that pretty much look like you took a bunch of grapes, then made it round and painted it with metallic silver spray paint. ]
Oh, the wavy bits went just fine, only the smallest of the beads were going to work anyways.
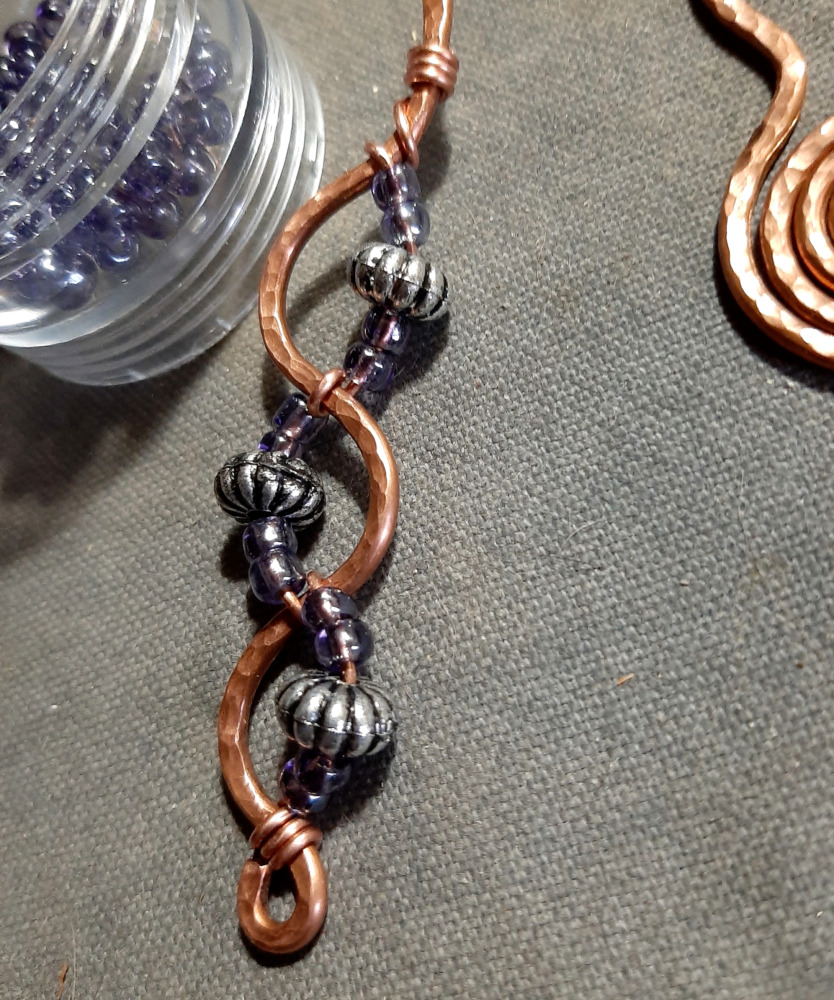
[ The longest of the wavy pieces now has beads wired to it in mirrored arcs, each of which has a single oval silvery bead with two of the smallest purple beads on each side. ]
I got those done, then put them in place, or at least stuck them where (I thought) they were going.
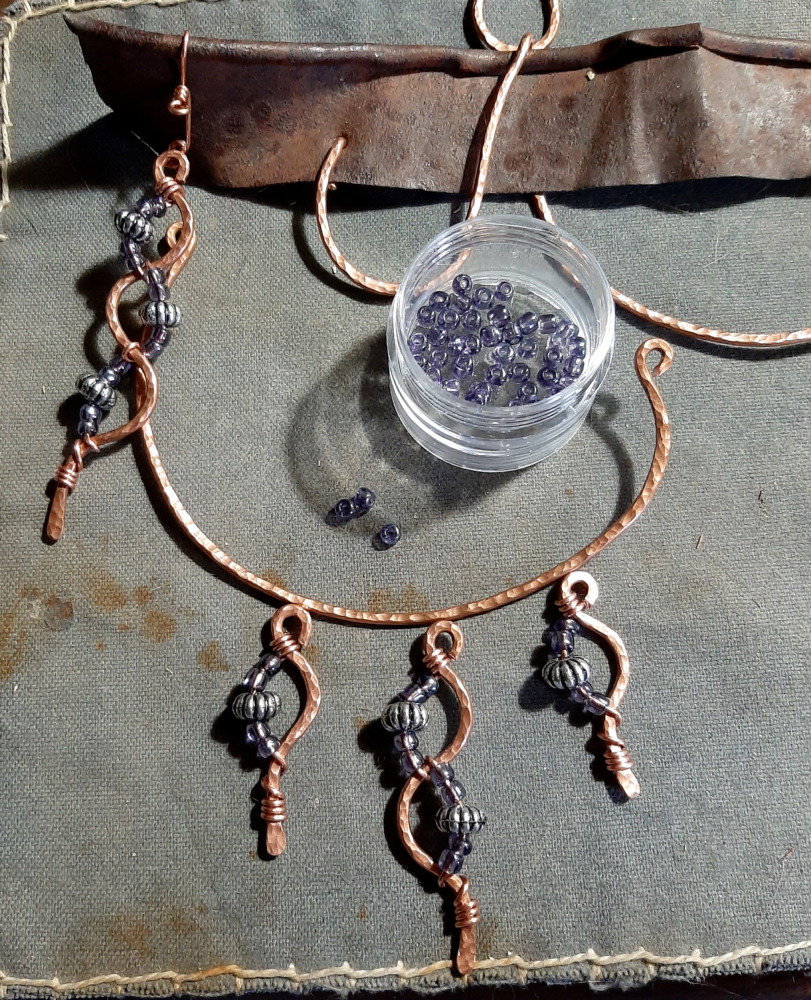
[ The three shorter wavy pieces sit just below the longer arc; the fourth, longest one, sits at one of the left side fastening points. ]
But then it was time for danglies, & you really need more size variation for danglies, so I dug out the faceted beads — I don’t do a lot with faceted stones, but these are, well, _purple_ — & took a look. At which point I found that they were _far_ too different a purple to go with my little spacer beads.
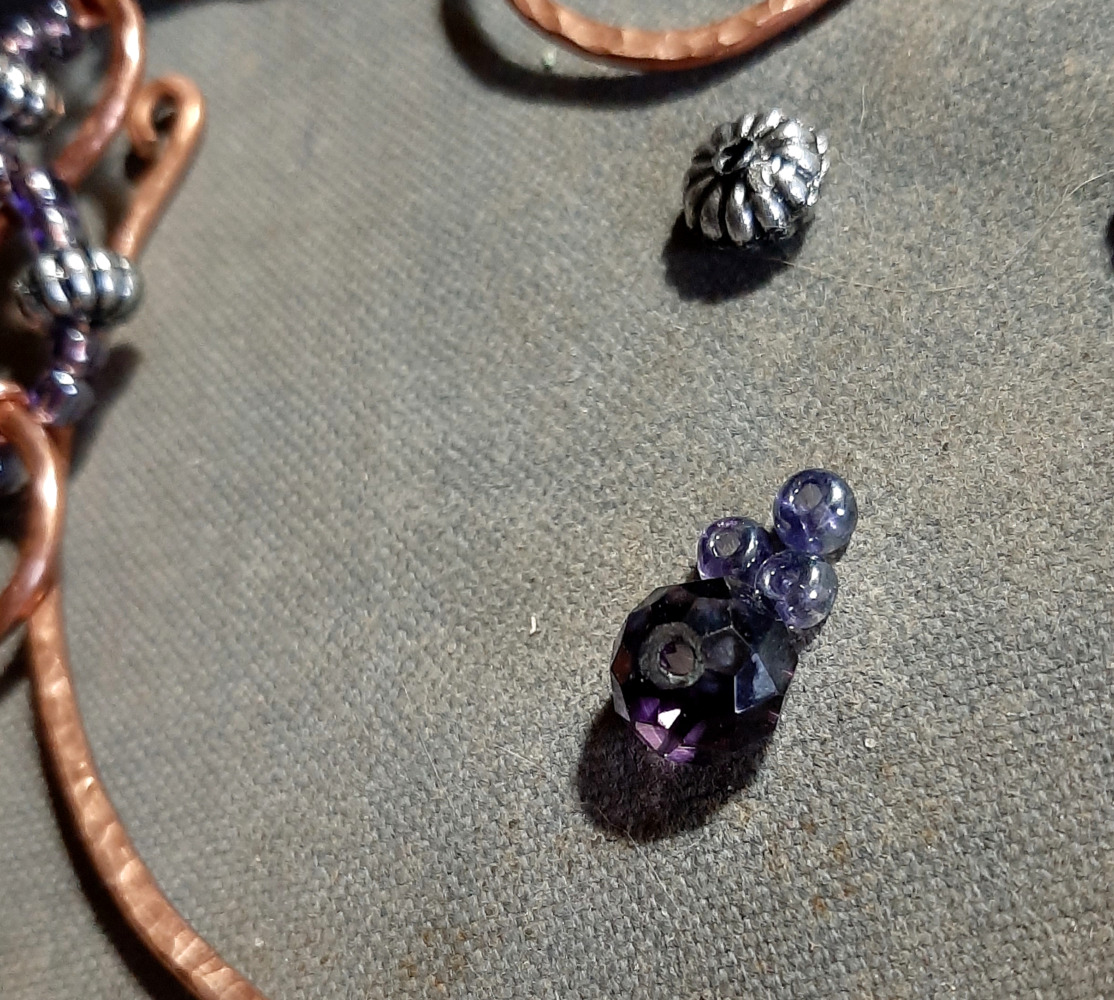
[ The faceted bead is very much a reddish purple; the smaller spacer beads are a blue-purple, what some people call indigo. ]
This would likely work fine for a lot of folks but I have a hard time putting together things that cross the line between cool & warm colors, so that was out. I still had the amethyst, though …
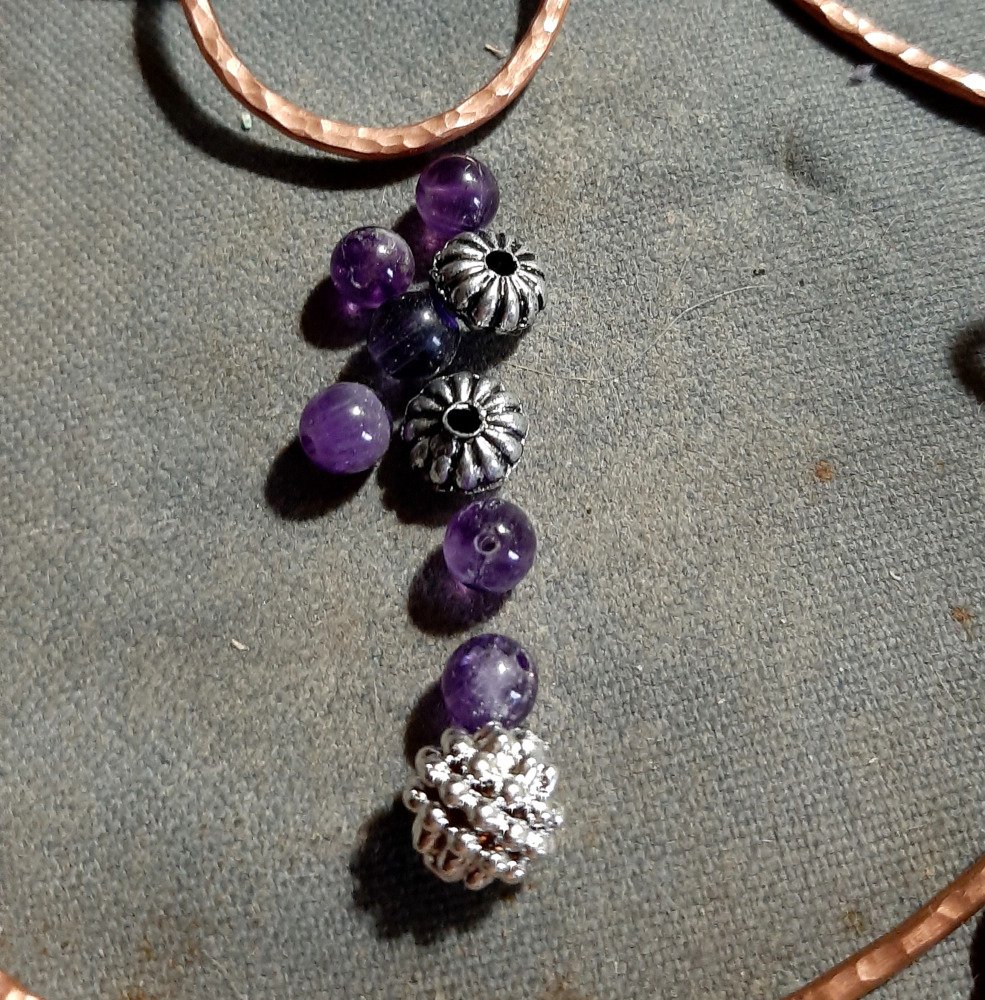
[ Six amethyst beads, two of the oval silvery ones, and one of the big silvery ones with the bumpies sit in sort of a linear clump. ]
Better, but … the bumpy silvery one was just _too_ much brighter & bigger. Well, I’d been wanting to use the leaves anyway …
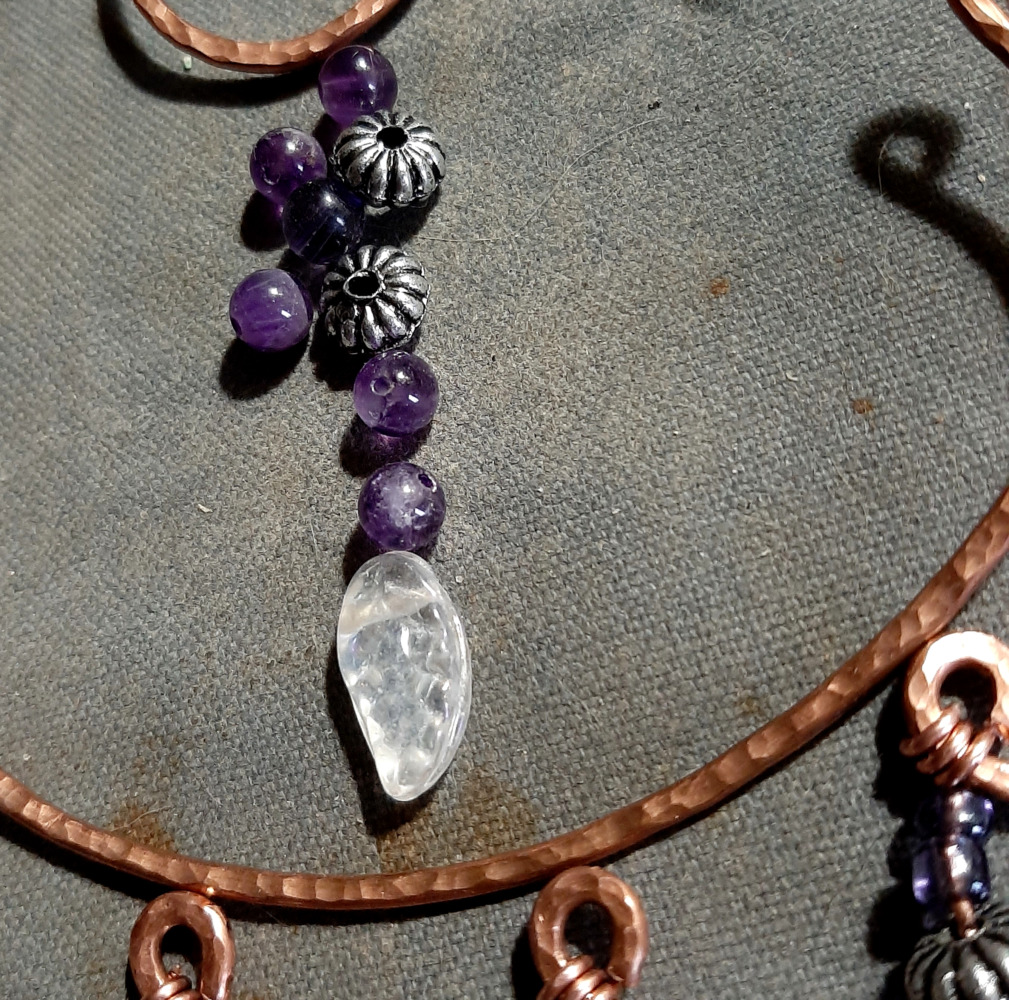
[ The same clump of beads, with a translucent white leaf bead in place of the silvery bead. ]
… yeah, that’s the ticket.
After all that I only wound up making three danglies (although I’m still considering another dangly to go next to the long one — at least, where the long one eventually wound up).
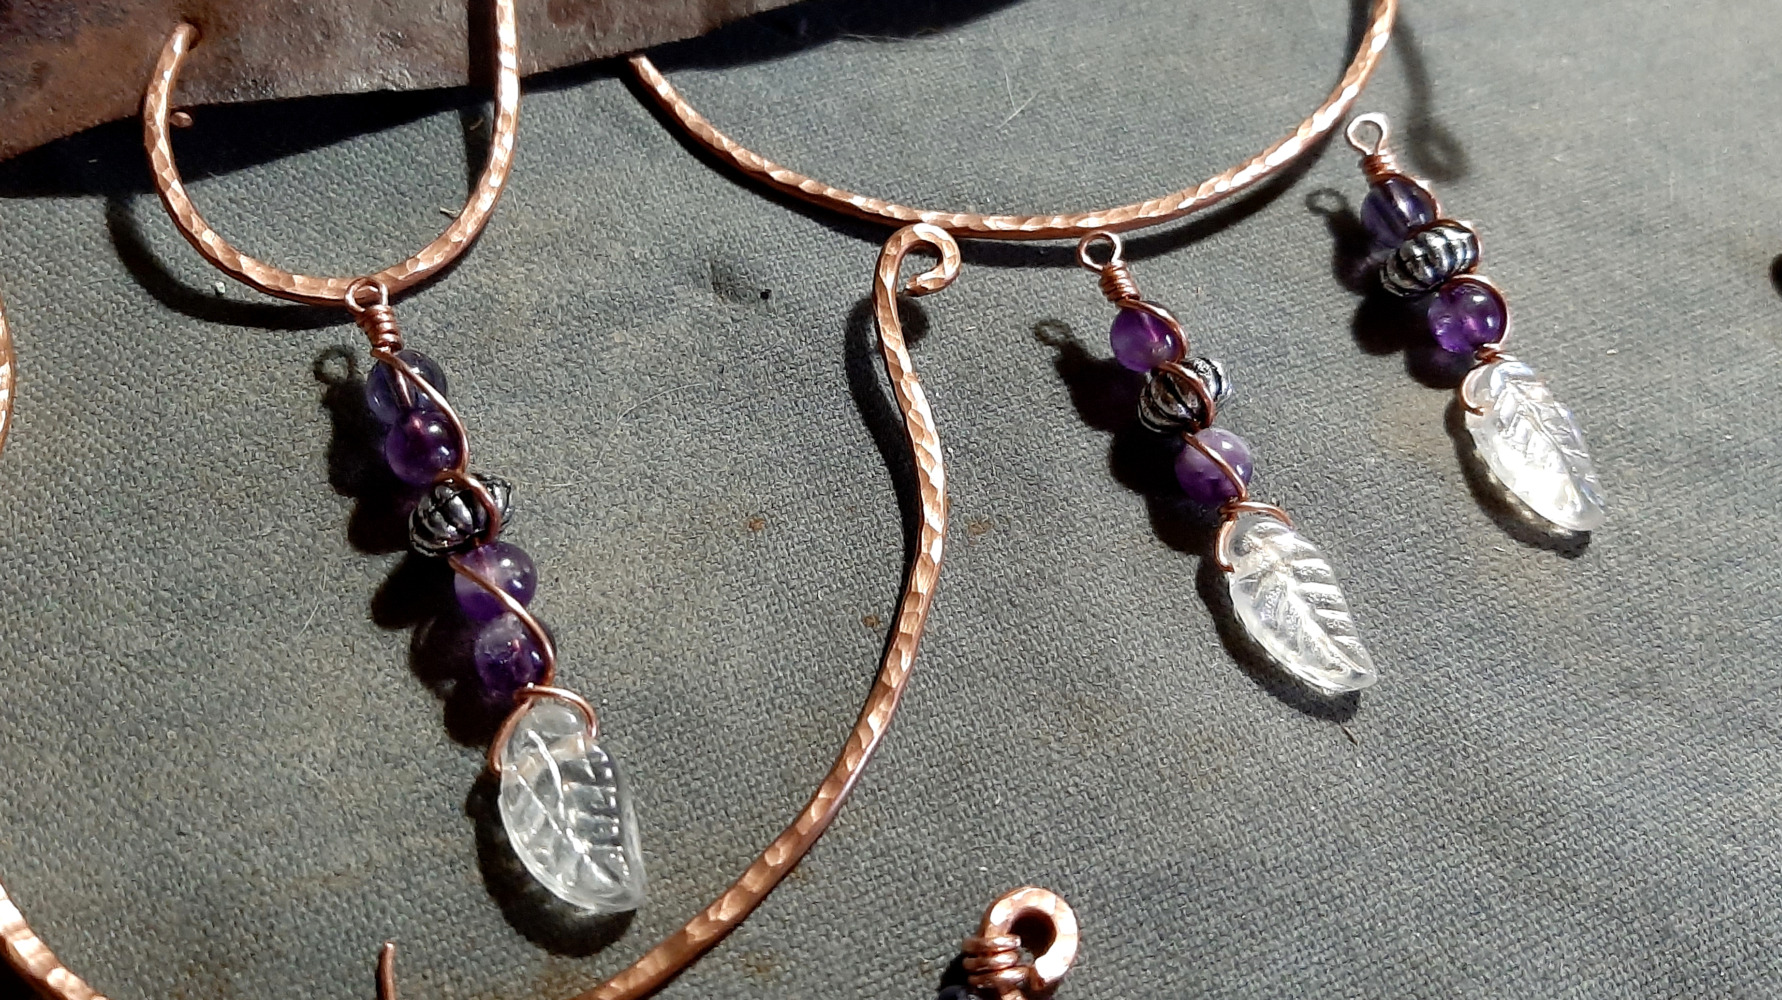
[ The longer dangly is sitting right above the larger of the two arcs, below a smaller third arc that I’d forgotten to mention; this one hangs down from where the hammered copper goes through the rusty bit, down to form the arc, and back up over the rusty bit. The two smaller ones hang from the other other arc on the right. ]
… & that’s when I stopped taking pictures. Because it turns out that there really wasn’t QUITE enough space for that longer dangly to fit without hitting the big arc. I spent a while messing with the shape of the arc — it’s taller & narrower than it was, though not so much that most people would notice — but it was stubborn, & the hammer wasn’t going to get me anywhere, so I swapped the long one to the right, hung one of the smaller ones from that spot, & made a loop at the top end of the right-side arc to hang the other small one. YARGH, this gets hard to describe in words.
Next up, I found that the long wavy piece, when hung on the left, was too close to the left side of the big arc, & the two sort of blurred together. That was an easy fix; swap the wavy bit with the spiral on the other side.
Then it was just wrapping the various danglies onto the various arcs with spacer beads in various numbers in between, plus last-minute tweaking of shapes, then hanging the whole thing up & GLARING at it for a while, & then, THEN, I was done.
… y’all. It was a LOT. But now it looks like this.
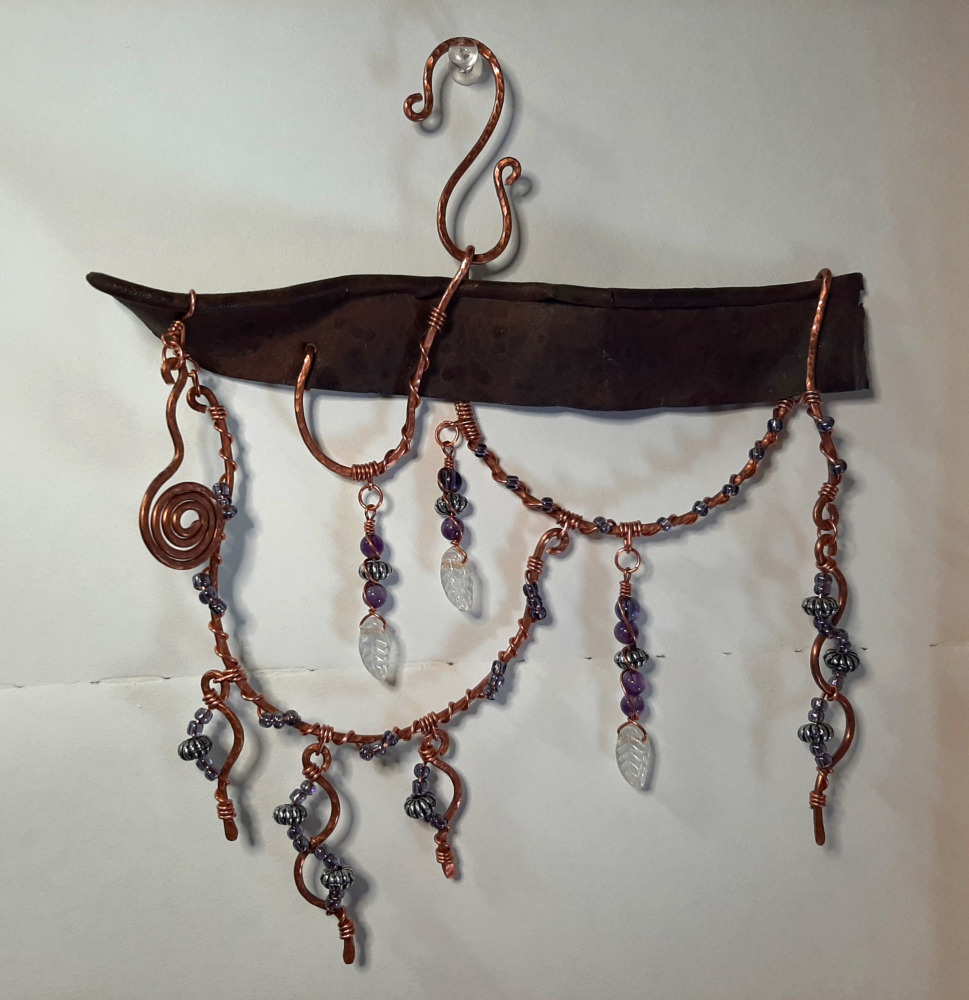
[ The finished piece! As described throughout the post, pretty much, but: A roughly rectangular piece of rusty metal, adorned with hammered copper wire in hanging arcs, which are decorated with purple, white, and silvery beads. ]
Haven’t posted this one yet either, but I just put together a(nother) new picture taking setup, so with a lot of luck it’ll go up soon!